Contents
When water damage strikes, knowing how to respond quickly can save you time, money, and stress. You must first identify the source and ensure safety by turning off the electrical power. Documenting the damage is vital for insurance claims, but that’s just the beginning. There’s a systematic approach to managing and repairing the aftermath effectively. Let’s explore these essential tips to help you navigate this challenging situation.
Key Takeaways
- Quickly identify the source of water damage and seal leaks to prevent further issues.
- Turn off electrical power to ensure safety before starting any repairs.
- Document all damage with photographs and detailed notes for insurance claims.
- Remove standing water using a wet/dry vacuum and dry affected areas promptly.
- Clean and disinfect surfaces with appropriate solutions to prevent mold growth.
Identify the Source of Water Damage
When you discover water damage in your home, the first step is to identify its source, as this is vital for effective repair.
Begin your damage assessment by inspecting visible areas such as ceilings, walls, and floors. Look for discoloration, warping, or mold, which may indicate a leak. Common water sources include burst pipes, overflowing toilets, or damaged roofs.
Don’t forget to check hidden areas like basements and crawl spaces, where moisture can accumulate unnoticed.
Once you locate the water source, you can take appropriate action to mitigate further damage. This might involve temporarily sealing leaks or moving furniture and valuables out of harm’s way.
Remember, swift action protects your home and fosters a sense of belonging and security for you and your family.
Turn Off Electrical Power
When dealing with water damage, safety is your top priority.
Before you start any repairs, locate your main circuit breaker and turn off the electrical power to prevent any electrical hazards.
This simple step can protect you from serious injuries while you assess the situation.
Safety First
Before you start addressing water damage, it’s vital to turn off the electrical power in the affected areas. This step protects you from electric shock and ensures your safety as you assess the damage.
Equip yourself with personal protective gear like gloves and boots before entering. If you encounter any hazards, keep a first aid kit nearby, just in case.
Always be cautious of wet surfaces and avoid using electrical appliances until you’re certain everything is dry and safe. Remember, prioritizing safety is significant during this process.
You want to protect yourself and others while restoring your space. Following these guidelines helps create a supportive environment as you tackle the challenges of water damage together.
Locate the Main Circuit Breaker
To effectively turn off the electrical power in a water-damaged area, you need to locate the main circuit breaker. This vital step ensures your safety while addressing the damage. Here’s how to find it:
Identify the Circuit Location: Typically, the main breaker is in a utility room, basement, or garage. Look for a metal panel with a latch or door.
Check for Labels: Inspect the panel for labels indicating which breakers control specific areas of your home. This can help you identify the main breaker quickly.
Turn Off the Main Breaker: Once located, flip the main breaker switch to the “off” position. This will cut power, allowing you to safely proceed with your water damage repairs.
Document the Damage
As you assess the extent of water damage, it’s important to document everything thoroughly. Start by conducting a detailed damage assessment. This involves checking all affected areas, including walls, floors, and personal belongings.
Take clear, high-quality photographs of the damage from various angles, ensuring you capture the full extent of the issue. Photographic evidence is essential for insurance claims and helps professionals understand the situation better.
Make notes alongside your images, detailing the date, time, and location of each photo. Include descriptions of damaged items, as well as any visible mold or structural issues.
This documentation aids in the immediate repair process and serves as a crucial record for your insurance company. By meticulously documenting the damage, you create a strong foundation for your claim and demonstrate the seriousness of the situation, ensuring you have the support you need during this challenging time.
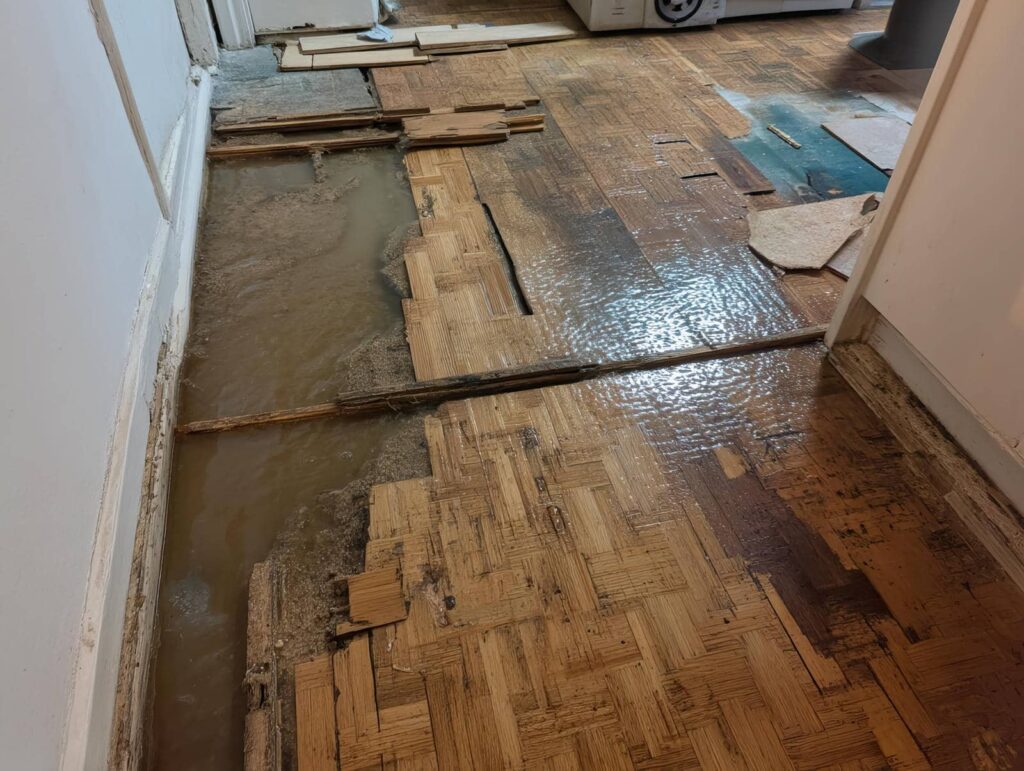
Remove Standing Water
Once you’ve documented the damage, it’s time to tackle the standing water.
Removing excess water is essential to prevent further damage and avoid standing water hazards, which can lead to mold and structural issues.
Here’s how to proceed effectively:
Use a Wet/Dry Vacuum: This is one of the best water extraction techniques. Make certain it’s suitable for the volume of water you’re dealing with.
Mop and Towels: For smaller areas, you can use mops or towels to soak up remaining water. Be thorough to minimize moisture.
Check Drains and Sumps: Verify that all drains are clear and functioning. If you have a sump pump, now’s the time to check its operation.
Dry Out Affected Areas
Once you’ve removed standing water, it’s essential to assess the extent of the damage to determine your next steps.
Use fans and dehumidifiers to expedite the drying process, and promptly remove any wet materials that could lead to mold growth.
Acting quickly will help minimize damage and restore your space effectively.
Assess Water Damage Extent
To effectively assess the extent of water damage, start by inspecting all affected areas thoroughly.
This water damage assessment is vital for determining damage severity and planning your next steps.
Here’s how to do it:
Check for Visible Moisture: Look for standing water or damp spots on floors, walls, and ceilings.
Inspect Materials: Assess the condition of carpets, drywall, and furniture, as these materials can absorb water and may need replacement.
Smell for Mold: Pay attention to any musty odors, which can indicate mold growth and further damage.
Use Fans and Dehumidifiers
Using fans and dehumidifiers is crucial for effectively drying out areas affected by water damage. Proper fan placement can greatly enhance airflow, making it easier to evaporate moisture. Position fans towards damp spots, creating a cross-ventilation effect. Adjust the dehumidifier settings based on the humidity level; a lower setting works best in drier conditions, while a higher one suits more humid environments.
| Action | Purpose | Outcome |
|---|---|---|
| Position fans correctly | Enhance airflow | Accelerated drying |
| Set dehumidifiers well | Remove excess moisture | Prevent mold growth |
| Monitor humidity levels | Verify ideal settings | Effective moisture control |
| Regularly check progress | Stay informed | Timely interventions |
These steps foster a community spirit, guiding you through recovery seamlessly.
Remove Wet Materials Promptly
Removing wet materials promptly is essential for minimizing damage and preventing mold growth.
When water damage occurs, swift action can make all the difference. Here are three important steps to follow:
Identify and remove items: Quickly dispose of carpets, drywall, and furniture that have absorbed moisture. Proper wet material disposal helps prevent further damage.
Dry out affected areas: Use fans and dehumidifiers to reduce moisture absorption and speed up the drying process.
Inspect and clean: Check hidden areas like behind walls or under cabinets for moisture, and clean thoroughly to avoid mold development.
Remove Damaged Materials
Begin by evaluating the extent of the damage to your materials. Identify which items are beyond repair, such as soaked drywall, insulation, or flooring.
Once you’ve assessed the situation, it’s vital to act quickly. Start with water extraction to minimize further damage. Use a pump or wet/dry vac to remove standing water.
Next, focus on material disposal. Carefully remove any damaged items, ensuring you follow safety protocols. Wear gloves and a mask, especially when dealing with mold or hazardous materials.
Proper disposal is imperative; check local regulations to verify compliance.
As you clear out damaged materials, keep the area organized to prevent accidents.
Disinfect the Area
Once you’ve removed damaged materials, it’s essential to disinfect the area to prevent mold and bacterial growth.
Gather the right cleaning supplies and choose appropriate disinfectants that target waterborne pathogens.
Don’t forget to ensure proper ventilation while cleaning, as this helps disperse any harmful fumes.
Gather Cleaning Supplies
Gathering the right cleaning supplies is vital for effectively disinfecting the area affected by water damage.
You’ll want to ensure you have a solid selection of cleaning tools and sanitizing agents. Here’s a quick list to get you started:
Mops and Buckets: Choose a sturdy mop for larger areas and a bucket for mixing your cleaning solutions.
Sponges and Rags: These are essential for reaching tight spaces and wiping down surfaces.
Disinfectants: Make sure to select effective sanitizing agents that can eliminate bacteria and mold.
Use Appropriate Disinfectants
Effective disinfectants are essential for ensuring the safety and cleanliness of areas affected by water damage. You need to choose the right disinfectant types, such as chlorine bleach or hydrogen peroxide, to effectively eliminate harmful pathogens. Always read the labels for proper dilution and safety instructions.
When applying disinfectants, use appropriate application techniques—spray the solution evenly across surfaces and allow it to sit for the recommended contact time. This ensures maximum effectiveness in killing germs and preventing mold growth.
Don’t forget to wear protective gear, like gloves and masks, to safeguard yourself while working. By following these guidelines, you’ll create a safe environment for everyone in your space, helping to restore a sense of belonging in your home.
Ensure Proper Ventilation
To ensure proper ventilation while disinfecting the area affected by water damage, it’s vital to open windows and doors to facilitate airflow. This ensures effective air circulation, essential for reducing moisture and preventing mold growth.
Here are three effective ventilation methods you can use:
Natural Airflow: Open all windows and doors to create a cross-breeze, allowing fresh air to replace damp air.
Fans: Use oscillating or box fans to boost air circulation, directing airflow towards windows to expel humidity.
Dehumidifiers: Place dehumidifiers in the affected area to draw out excess moisture, complementing natural ventilation methods.
Check for Mold Growth
While addressing water damage, you must check for mold growth as soon as possible. Mold can develop within 24 to 48 hours in damp environments, posing significant health risks. Early detection is key to effective mold prevention and safeguarding your space.
Here’s a quick reference table to help you identify mold growth:
| Signs of Mold | Potential Health Risks | Prevention Tips |
|---|---|---|
| Musty odor | Allergic reactions | Keep areas dry |
| Discoloration on walls | Respiratory issues | Use dehumidifiers |
| Dark spots on surfaces | Skin irritations | Regularly inspect areas |
| Water stains | Fatigue and headaches | Improve ventilation |
Restore and Repair
Once you’ve addressed mold concerns, it’s time to focus on restoring and repairing the affected areas.
Effective water restoration goes beyond simple cleanup; it involves applying the right repair techniques to ensure your space is safe and functional again.
Here are three essential steps to guide your restoration process:
Assess Damage: Inspect the area thoroughly to identify all affected materials, including drywall, flooring, and furniture. This helps determine what can be salvaged and what needs replacement.
Dry and Dehumidify: Use fans and dehumidifiers to eliminate moisture. This step is critical in preventing further damage and mold growth.
Repair and Replace: Depending on your assessment, execute necessary repairs. This may include patching up drywall, replacing flooring, or treating wooden structures to prevent rot.
Prevent Future Water Damage
Preventing future water damage starts with being proactive about your home’s maintenance. Regular inspections are essential; check for leaks in plumbing, roofing, and windows. Early detection can save you from costly repairs down the line.
Consider using water-resistant materials in areas prone to moisture, like bathrooms and basements. These materials can considerably reduce the risk of water damage and mold growth.
Make certain that gutters and downspouts direct water away from your foundation to prevent pooling.
Don’t overlook your appliances; regularly inspect hoses and connections for wear and tear. Investing in a sump pump can provide extra protection, especially in flood-prone areas.
Frequently Asked Questions
How Can I Tell if Water Damage Is Severe?
To determine if water damage is severe, look for water damage signs like discoloration, mold growth, or warped surfaces. Evaluating damage promptly helps you prevent further issues and ensures your home remains safe and secure.
Should I Hire a Professional for Water Damage Repairs?
When facing water damage, hiring a professional for a thorough water damage assessment often saves you time and money. While DIY repairs might seem tempting, experts ensure safety and effective solutions you might overlook.
What Insurance Coverage Typically Applies to Water Damage?
Picture your home drenched, memories at risk. Most homeowners’ insurance covers sudden water damage claims, but watch out for exclusions like flooding or neglect. Understanding your policy’s specifics can help safeguard your sanctuary and peace of mind.
How Long Does It Take to Fully Restore a Water-Damaged Area?
Restoring a water-damaged area typically takes a few days to weeks. The drying process is essential; it ensures proper moisture removal, preventing mold growth and structural damage. Rely on professionals for efficient water damage restoration.
What Are the Health Risks Associated With Water Damage?
You might not realize it, but water damage can lead to serious health risks. Mold growth thrives in damp areas, while structural damage may compromise safety, leading to potential hazards in your home environment. Stay vigilant!
Wrap-Up
Water damage can be devastating, affecting up to 1 in 50 homeowners each year, according to the Insurance Information Institute. By following these essential tips, you can effectively manage the situation and minimize long-term effects. Swift action protects your property and saves you money on repairs. Remember, regular maintenance and vigilance are key in preventing future incidents. Stay proactive, and you’ll safeguard your home against the unexpected challenges of water damage.
Recent Posts
10 Tips for Mold Remediation After Flooding
Flooding can lead to rapid mold growth, which poses serious health risks and damages your
3 Best Mold Remediation Strategies After Flood Damage
After flood damage, addressing mold growth is essential for your health and property. You need
Effective Mold Remediation After Flood Damage
Have you ever wondered just how quickly mold can take hold after a flood? The