Contents
Imagine you’ve just returned home to find your basement flooded after a heavy storm. The damage can feel overwhelming, but following ten essential steps for professional flood damage repair can help you regain control. Each step is vital, from evaluating the damage to implementing preventative measures for the future. You’ll want to understand how to navigate this process effectively to ensure your home is safe and sound again.
Key Takeaways
- Document damage with detailed notes and photographs for insurance claims and recovery assessment.
- Ensure safety by wearing protective gear and checking for hazards before entering the affected area.
- Remove standing water using appropriate pumps and wet vacuums, followed by drying with fans and dehumidifiers.
- Clean and sanitize affected areas thoroughly, using bleach solutions for mold and effective waste disposal methods.
- Restore electrical systems with professional help, ensuring safety before re-energizing and implementing preventative measures against future flooding.
Assessing the Damage
When you begin evaluating the damage from a flood, it’s essential to approach the situation methodically to ensure nothing is overlooked.
Start by documenting the areas affected; take clear photographs and make detailed notes of the extent of the damage. Inspect both the interior and exterior of your property. Look for structural issues, such as cracks in the foundation or walls, and check for damage to electrical systems and plumbing.
Next, assess the contents of your home. Identify items that are salvageable and those that need to be discarded. Pay particular attention to your personal belongings, as they hold emotional value.
Lastly, keep a record of your findings; this will be significant when filing insurance claims or seeking assistance.
Ensuring Safety First
After evaluating the damage, prioritizing safety becomes paramount. You should always wear protective gear, including gloves, boots, and masks, to shield yourself from contaminants.
Check for hazards like exposed wires, gas leaks, or structural instability before entering the affected areas. If you notice any of these dangers, it’s best to call in professionals who can handle them safely.
Make sure to turn off electricity and water supplies to prevent further risks. Ventilate the space by opening windows and using fans, but be cautious of mold, which can develop quickly in damp conditions.
During this challenging time, remember you’re not alone—many have walked this path before you. Reach out to community resources for support, and don’t hesitate to ask for help when you need it.
Prioritizing your safety and well-being sets the foundation for effective flood damage repair.
Removing Standing Water
After ensuring safety, your next step is to assess the water levels in the affected area.
You’ll need to use appropriate pumping equipment to effectively remove standing water.
This process prevents further damage and helps create a safer environment for recovery efforts.
Assess Water Levels
Evaluating water levels is vital in flood damage repair, especially when it comes to removing standing water.
Start by carefully inspecting the affected areas to determine how deep the water is and how far it has spread. This evaluation helps you prioritize which sections need immediate attention.
Pay close attention to hidden pockets of water that can lead to mold or structural damage. Use a measuring tool to gauge the water depth accurately; this data is important for planning your next steps.
Document your findings for reference and share this information with your team. By methodically evaluating water levels, you ensure a more effective and coordinated response, fostering a sense of community as everyone works together towards recovery.
Use Pumping Equipment
To effectively remove standing water, you’ll need to utilize pumping equipment designed for flood situations. This equipment can help you manage water levels quickly and efficiently, reducing the risk of further damage.
Here’s a quick overview of common pumping options:
| Pump Type | Best Use |
|---|---|
| Submersible Pump | Deep water extraction |
| Diaphragm Pump | Non-electric environments |
| Sump Pump | Basements and crawl spaces |
| Trash Pump | Debris-laden water |
| Electric Pump | General flood conditions |
Once you select the right pump, follow the manufacturer’s instructions. Always prioritize safety by wearing protective gear and ensuring proper electrical connections. Together, we’ll restore your space and create a safe environment.
Drying and Dehumidifying
As you tackle flood damage repair, drying and dehumidifying your space is essential to preventing mold growth and structural deterioration. Start by removing any standing water, using pumps or wet vacuums to ensure that moisture levels are minimal.
Once the bulk of the water is gone, set up fans and dehumidifiers throughout the affected areas. This equipment accelerates evaporation and reduces humidity, which is critical for effective drying.
Monitor the moisture levels using a hygrometer; aim for levels below 60%. It’s important to keep windows and doors closed to prevent outside humidity from interfering with your efforts.
Pay attention to hidden areas, such as behind walls and under floors, which may retain moisture.
Cleaning Affected Areas
Before you start cleaning affected areas, it’s essential to prioritize safety precautions to protect yourself from potential hazards.
Once you’ve ensured a safe environment, you can apply effective cleaning techniques to remove contaminants and prevent mold growth.
Let’s discuss the steps necessary to restore your space efficiently and safely.
Safety Precautions First
Although cleaning flood-affected areas is essential for restoring your home, safety must come first to protect yourself and others.
Before you start, wear protective gear, including gloves, masks, and waterproof boots. This minimizes exposure to contaminants and hazardous materials.
Verify the area is free from electrical hazards; turn off power to affected rooms if necessary.
Ventilate the space by opening windows and using fans, which helps reduce mold growth.
Be cautious of structural damage; if you notice sagging ceilings or walls, avoid entering.
If you’re unsure about any aspect of the clean-up, consult professionals.
Effective Cleaning Techniques
Once you’ve ensured your safety, it’s time to tackle the cleaning process.
Begin by removing any standing water with a pump or wet/dry vacuum. Next, wear protective gear and remove soaked materials like carpets, insulation, and drywall, as these can harbor mold.
Clean surfaces with a mixture of water and detergent, ensuring to scrub thoroughly. For areas affected by mold, use a solution of one cup of bleach to one gallon of water, but be careful not to mix it with other cleaners.
Rinse surfaces well, and allow everything to dry completely to prevent future damage. Finally, dispose of contaminated materials responsibly and document everything for insurance claims.
This methodical approach helps you reclaim your space and restore your peace of mind.
Inspecting for Mold Growth
As you begin the flood damage repair process, inspecting for mold growth is essential to ensuring a safe and healthy environment. Mold can develop quickly in damp areas, often within 24 to 48 hours after flooding.
Start by checking hidden spaces, such as behind walls, under carpets, and in crawl spaces. Look for discoloration, musty odors, or visible mold colonies.
Use a moisture meter to detect elevated humidity levels, which can indicate potential mold growth. If you find any signs, it’s vital to address them promptly. Even small patches can spread rapidly if left untreated.
If the affected area is extensive or you’re unsure, consider consulting a professional for thorough testing and remediation.
This is about repairing damage and creating a safe space for you and your loved ones. Your health matters, and taking these steps helps protect it.
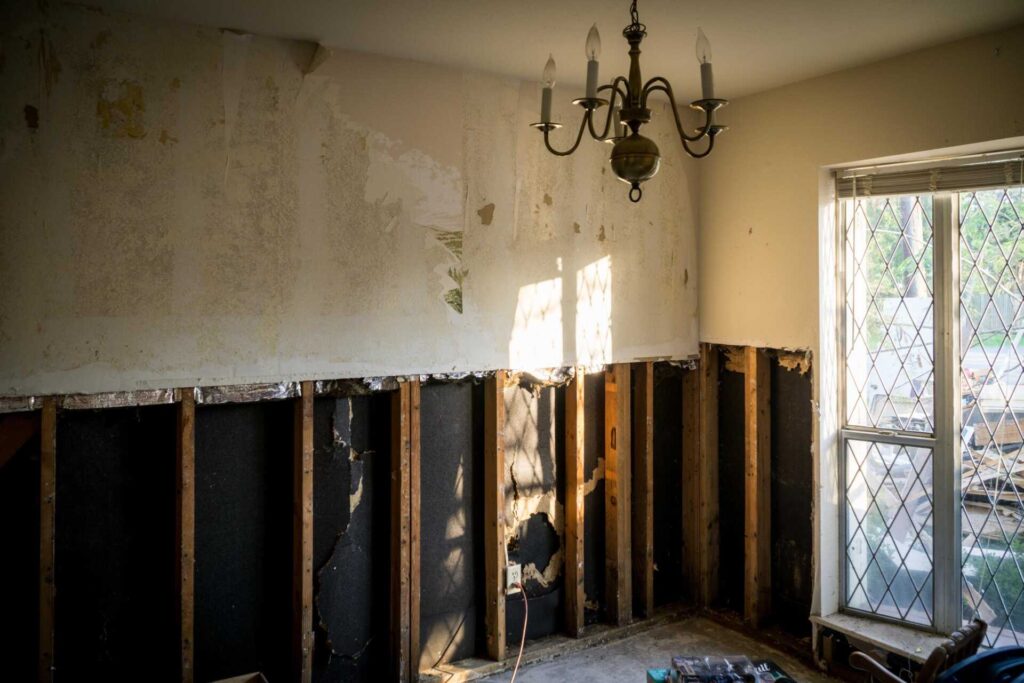
Repairing Structural Damage
After ensuring that mold growth is under control, the next step is to assess and repair any structural damage caused by the flooding. You’ll want to start by examining the foundation, walls, and beams for signs of weakness or instability. Document any visible damage, as this will guide your repair process.
| Structure | Common Issues | Recommended Actions |
|---|---|---|
| Foundation | Cracks, Settling | Reinforce or underpin |
| Walls | Warping, Cracking | Replace or repair sections |
| Beams | Sagging, Rot | Replace or reinforce |
Addressing these issues promptly is essential for your safety and the integrity of your home. Remember, it’s okay to seek professional help if the damage is extensive. You’re not alone in this process, and ensuring your home is safe is the top priority.
Restoring Electrical Systems
While you prioritize safety in the aftermath of flooding, restoring your electrical systems is vital to ensuring your home is habitable again.
Start by evaluating the damage—water can severely compromise your wiring and outlets. It’s important to have a licensed electrician evaluate your system before re-energizing any circuits.
Consider these steps for a systematic approach:
- Disconnect power to prevent any hazards during the evaluation.
- Inspect wiring for corrosion, insulation damage, or signs of short-circuiting.
- Replace damaged outlets and switches to restore functionality and safety.
Final Cleanup and Sanitization
Once you’ve addressed the immediate repairs, it’s vital to focus on final cleanup and sanitization.
Start by evaluating contaminated areas to identify any potential health risks, then move on to effective surface disinfection to eliminate harmful pathogens.
Finally, ensure proper waste disposal methods are followed to prevent further contamination and promote a safe environment.
Assessing Contaminated Areas
As you begin the final cleanup and sanitization process, it’s essential to thoroughly assess contaminated areas to secure safety and prevent further health risks.
Start by identifying zones where water intrusion occurred, noting visible debris and discoloration.
Pay special attention to:
- Mold growth on walls or ceilings, which can pose serious health risks
- Contaminated carpets or rugs that may harbor bacteria and odors
- Structural damage that could compromise safety and stability
Document your findings, as this will help you prioritize your cleanup efforts and ensure a thorough approach.
Remember, your safety and that of others is paramount, so don’t hesitate to call in professionals if contamination levels are beyond your control.
You’re not alone in this journey; support is available.
Effective Surface Disinfection
To ensure a safe and healthy environment after flood damage, effective surface disinfection is essential.
Begin by removing any visible debris and excess moisture, as these can harbor harmful pathogens. Use EPA-approved disinfectants tailored for flood situations, ensuring you follow the manufacturer’s instructions for dilution and contact time.
Pay close attention to high-touch surfaces like doorknobs, countertops, and light switches. Equip yourself with personal protective gear, including gloves and masks, to safeguard your health during this process.
Allow surfaces to air dry completely, as this enhances the disinfectant’s effectiveness. Finally, consider using a second round of disinfection for assurance.
Taking these steps helps you reclaim your space, ensuring it’s safe for you and your loved ones.
Proper Waste Disposal Methods
After you’ve completed surface disinfection, addressing waste disposal is essential for effective final cleanup and sanitization.
Properly handling debris ensures a safe environment and demonstrates a commitment to recovery.
Follow these methods to manage waste responsibly:
Seal contaminated items in heavy-duty plastic bags to prevent leakage and odor.
Contact local waste management for guidelines on hazardous materials, ensuring compliance and safety.
Dispose of organic waste in a designated area to discourage pests and promote hygiene.
Preventative Measures for the Future
While you can’t control the weather, implementing preventative measures for the future can considerably reduce the risk of flood damage to your property.
Start by evaluating your landscape. Verify proper grading directs water away from your foundation. Installing gutters and downspouts can effectively channel rainfall away from your home.
Consider flood barriers or sandbags for high-risk areas. You might also want to invest in a sump pump to manage excess water, especially in basements.
Regularly check and maintain your drainage systems, as blockages can lead to unexpected flooding.
Finally, stay informed about local flood zones and updates. Joining community groups focused on flood prevention can provide valuable resources and support.
Final Thoughts
Ultimately, addressing flood damage effectively requires a methodical approach to ensure safety and restore your space. You might feel overwhelmed by the process, but remember that each step you take mitigates immediate risks and lays the groundwork for future resilience. By implementing preventative measures, you’re investing in the longevity of your property. Trust in the process, and you’ll regain a sense of normalcy while safeguarding against potential flooding.
Recent Posts
10 Tips for Mold Remediation After Flooding
Flooding can lead to rapid mold growth, which poses serious health risks and damages your
3 Best Mold Remediation Strategies After Flood Damage
After flood damage, addressing mold growth is essential for your health and property. You need
Effective Mold Remediation After Flood Damage
Have you ever wondered just how quickly mold can take hold after a flood? The